Page 2 of 5 FirstFirst 12345 LastLast
Results 11 to 20 of 41

Thread: Galvo/Amp Upgrade

  1. #11
    Join Date
    Jan 2006
    Location
    Charleston, SC
    Posts
    2,147,489,446

    Default

    Quote Originally Posted by jdavis7765 View Post
    To add a little more about the laser 2 pin connectors on the ILDA board. The positives do "ohm back correctly to their respective R, G, B + pins on the ILDA connector. The Grounds for each seem to have commonalities amongst a few pins (not sure if this is as intended).
    Yes, it is normal for the negative color signals to share a common ground. Most controllers use a single-ended output for the color modulation signal, so the R-, G- and B- signals are already common to ground from the controller end.

    Quote Originally Posted by jdavis7765 View Post
    For the laser shut off key, can I route the gounds from the ILDA RGB negatives through this to work it properly or does it need to be controlled by a relay of sorts?
    You can do this, but a better method would be to use the keyswitch to control a triple-pole, double-throw relay and switch each one of the POSITIVE inputs to the drivers.

    The idea is that in the de-energized position the relay would connect the positive side of the laser driver modulation inputs to ground, making sure that there is no possibility of laser output. (Certain laser drivers will allow some output if the positive modulation input is disconnected and left floating, so by crowbarring to ground you eliminate that possibility.)

    When the relay is energized it should connect the modulation inputs on the drivers to the appropriate R+, G+ and B+ pins on your ILDA connector.

    Here's a complete interlock schematic. Look at the relay contacts for Red, Green, and Blue and you'll see what I'm talking about. Note, however, that this circuit also includes a remote, a latching relay, a projector "start" circuit, and a few other features that you probably weren't planning to add to your projector.

    Adam
    Attached Thumbnails Attached Thumbnails Interlock Schematic.bmp  


  2. #12
    Join Date
    Nov 2019
    Location
    West Chester, PA
    Posts
    61

    Default

    First of all, thank you all for the replies!

    I am reuploading the schematic, not sure what revising I need to do to omit the remote interlock box. I took electronics is highschool but I am far from perfect, but does this looks like what I would need to omit? Would I need to keep the diode and the inductor as well (circled in purple)Click image for larger version. 

Name:	InkedInkedInterlock Schematic_LI.jpg 
Views:	6 
Size:	705.0 KB 
ID:	56831 or can that be ommited as well?

    Again thanks for helping me out


    Quote Originally Posted by buffo View Post
    Yes, it is normal for the negative color signals to share a common ground. Most controllers use a single-ended output for the color modulation signal, so the R-, G- and B- signals are already common to ground from the controller end.


    You can do this, but a better method would be to use the keyswitch to control a triple-pole, double-throw relay and switch each one of the POSITIVE inputs to the drivers.

    The idea is that in the de-energized position the relay would connect the positive side of the laser driver modulation inputs to ground, making sure that there is no possibility of laser output. (Certain laser drivers will allow some output if the positive modulation input is disconnected and left floating, so by crowbarring to ground you eliminate that possibility.)

    When the relay is energized it should connect the modulation inputs on the drivers to the appropriate R+, G+ and B+ pins on your ILDA connector.

    Here's a complete interlock schematic. Look at the relay contacts for Red, Green, and Blue and you'll see what I'm talking about. Note, however, that this circuit also includes a remote, a latching relay, a projector "start" circuit, and a few other features that you probably weren't planning to add to your projector.

    Adam

  3. #13
    Join Date
    Nov 2019
    Location
    West Chester, PA
    Posts
    61

    Default

    Sorry for the double reply, but two more quick questions. In the drawing I did above. Can you tell from the looks of it if the RGB two pin laser connectors look as if they would plug into their respective ILDA pins? It looks as though they do but I just want to be safe?

    Second question, would I want to make all the RGB ILDA grounds common all the way back to the laser PSU? How about common ground to the Scanner PSU?

  4. #14
    Join Date
    Aug 2013
    Posts
    73

    Default

    Quote Originally Posted by jdavis7765 View Post
    I think I am progressing along here, not too sure. For the laser shut off key, can I route the gounds from the ILDA RGB negatives through this to work it properly or does it need to be controlled by a relay of sorts?

    No, this will only work if the input terminals are isolated from the power supply, which is not going to be the case with virtually any laser driver. The positive modulation lines are still referenced to the system ground, which your diode drivers are still going to be connected to via the power supply. So there's still a common ground reference that can cause the drivers to see a modulation signal even with the negative modulation line connected, even if the driver has differential inputs. (A standard opamp+four resistor diff amp like this one just becomes a unity-gain amplifier with divided input if you disconnect the negative input.) Even without that implicit ground reference between the control signals and the drivers, the diode drivers still share a common ground via the power supply with each other, and differential voltages between the color signals can be converted into voltages that will activate one or more diode drivers by parasitic pathways through the driver input circuitry.


    Using a relay as buffo has shown will be the simplest and most reliable way to go.

    Quote Originally Posted by jdavis7765 View Post
    I think I am progressing along here, not too sure. For the laser shut off key, can I route the gounds from the ILDA RGB negatives through this to work it properly or does it need to be controlled by a relay of sorts?
    That inductor is actually the coil for the relay, and the diode is there to suppress the voltage spike that will otherwise occur when the relay switches off. I've taken the liberty of sketching a minimal relay-based key switch circuit just to make the base circuit clearer. This can be extended in many ways by changing how the relays are driven. I've also shown two relays because many of the multi-pole relays you can find off-the-shelf are designed for handling high power circuits and are not necessarily suitable for small signals. Note that a Class IV laser is actually required to have a manual reset action to restore output, which requires the sort of latching circuit included in buffo's schematic.
    Attached Thumbnails Attached Thumbnails Annotation 2020-07-09 131441.jpg  


  5. #15
    Join Date
    Nov 2019
    Location
    West Chester, PA
    Posts
    61

    Default

    I updated the original thread here with the final results if you want to check it out. Thanks all for answering my questions along the way!

  6. #16
    Join Date
    Jan 2006
    Location
    Charleston, SC
    Posts
    2,147,489,446

    Default

    Thanks to Andrew for re-drawing the schematic. Also, he correctly pointed out that interrupting the ground connection on the modulation input won't work because of the shared ground on the power input side. I had forgotten about that! But yeah, the correct method is to interrupt the positive modulation signal, which is shown in both schematics.

    The parts of my original schematic you crossed out are mostly correct, assuming that you don't want the remote box, but you did miss a few points. First, you need to connect the emitter of the 3055 transistor (the bottom part with the arrow pointing out - basically the output of the transistor in this circuit) directly to the input side of the relay coil and remove the latching contact portion of the relay (the first set of contacts above the coil). You also need to leave the 10K resistor in place that connects the base of the transistor to ground.

    If you trace through the circuit, this will become obvious: Closing the keyswitch applies 12 volt power to the collector of the 3055 transistor. If you have the ILDA plug connected to the controller, then 12 volt power will also flow to pin 17, down the ILDA cable to your controller, through the loop at the controller end, and back to the projector on pin 4. That 12 volt signal then hits the base of the 3055 transistor, so you've got 12 volts positive on the base. (The 10K resistor from the base to ground ensures this.) So now you have an NPN transistor with the collector positive and the base positive, which means the transistor will be "ON" and you'll have somewhat less than 12 volts at the emitter. But now you need this voltage to get to the relay coil to pull the contacts closed, and since you've removed the remote box (with the run button) there's no path for the output of the transistor to get to the relay at this point.

    To remedy this you need to remove the latching contact entirely and just connect the output of the transistor directly to the relay coil. Or, if you wanted to keep the ability to have a "run" or "start" button that would have to be pressed each time you wanted to re-start the projector following a power loss or unplugging a cable, then you could install a normally open, momentary push-to-close switch between the output of the transistor and the input to the relay coil and leave the latching contacts wired as shown. Then when you push the run button the relay coil energizes for a brief moment, but as soon as the contacts close that first set of latching contacts will complete the circuit from the transistor to the coil, at which point you can let go of the run button and the coil will stay energized through the latching contacts.

    Note also that you crossed out the wire for the emission indicator LED, but you did not cross out the actual LED. So if you want an emission indicator, you need to leave the LED and the wire that feeds it hooked up. Otherwise, yeah, remove both. (Andrew's circuit keeps the emission indicator intact.)

    Another difference is that one of the relay contacts on my circuit is used to switch the DC + supply to the lasers on and off, whereas in Andrew's circuit that pole is used to connect or disconnect the shutter signal from the controller to the shutter. Either option is fine, but as my projector did not have a shutter I decided to use DC power interruption as my secondary beam attenuation method.

    I completely agree with Andrew's suggestion to use a pair of double-pole, double-throw relays instead of a single, larger relay with more poles. In truth, when this circuit was installed in the projector that's exactly what I did - the schematic simply shows all the poles on a single relay for simplicity's sake. Also, some folks may wonder why I chose a 3055 transistor (which is normally used for power switching of large loads - up to 10 or 15 amps), and the answer is that it was what I had laying around when I first put this together. But any NPN transistor that can handle the combined current draw of the relay coil and the emission indicator will work.

    Finally, I feel it's important to note that I am a self-taught amateur when it comes to electronics, while Andrew makes a living designing electronics for X-Laser. The fact that he could explain things in two paragraphs while I had to write a book to explain my schematic should be an indicator of his superior knowledge and experience! Furthermore, his schematic is far easier to follow. The only reason for the added complexity of the transistor in my circuit was due to concerns about voltage drop over possibly long cable runs (both the ILDA cable and the remote box cable), but since you're omitting all that along with the redundant attenuation method I think you'd actually be better off using Andrew's simplified design rather than trying to modify mine.

    Adam

  7. #17
    Join Date
    Nov 2019
    Location
    West Chester, PA
    Posts
    61

    Default

    Still have to complete the key switch circuit when I have some more time. Had another question before that though.

    I wondered how to correctly position the scanner block so that the beam hits is correctly? I can figure out the horizontal position, but vertically, I can't seem to find a great way to do this. Should I just buy a solid block of aluminum and cut as needed? If so, what would be the best way to measure the height I would need the block to be? I have a digital caliper for measurements, but am confused how to measure the beam height in relation to mounting location without adding a lot of trial and error.

    Thanks again

  8. #18
    Join Date
    Jan 2006
    Location
    Charleston, SC
    Posts
    2,147,489,446

    Default

    Quote Originally Posted by jdavis7765 View Post
    I wondered how to correctly position the scanner block so that the beam hits is correctly? I can figure out the horizontal position, but vertically, I can't seem to find a great way to do this. Should I just buy a solid block of aluminum and cut as needed?
    Most scanner blocks have a designed beam-entry elevation of close to 1". Actually, there will be two acceptable entry elevations, depending on how you orient the scanner block in the projector (left entry vs right entry, meaning either you hit the top mirror first or you hit the bottom mirror first).

    Here's a drawing for the Pangolin Compact 506 scanner block showing both beam elevations: https://www.scannermax.com/pdf/4mm_W...m_Assem_LH.PDF

    If you don't have a drawing for your scanners you can measure from the bottom of the scanner block to the height of the galvo shaft on the mirror that the beam will strike first. That's the native elevation of the scanner block. Now measure the height of the incoming beam. If there is a significant difference between the two measurements , you will need to either shim the scanner block up or shim the lasers up. Ideally you want the incoming beam to be exactly level with the center of the first scanner mirror that the beam will strike. But if you are off a tiny amount it's not the end of the world. As long as you aren't so far off that part of the beam will "spill" off the edge of the mirror when it moves, you'll be fine.

    I don't know that you need to go buy a solid block of aluminum though. Unless you have access to a milling machine it will be very difficult to cut a solid block of aluminum down to size. It's far easier to simply stack up some thin layers of sheet metal underneath the scanner block to raise it to the correct height.

    On the other hand, if you need to adjust the height of the lasers, then you need to do a little planning first. Layering several pieces of sheet metal under the lasers will reduce the heat transfer to the baseplate, which might be a concern. In this case it might be better to purchase a single piece of plate aluminum and then cut out a rectangle that is large enough to mount your laser on while leaving room at the edges so you can bolt the whole thing to the baseplate. (You can easily cut the rectangle out from the plate with a jig saw and a metal blade.)

    Of course, plate aluminum is commonly available in just a few thicknesses, so you'll probably end up shimming the lasers until they are too high, and then doing the fine-adjustment by shimming the scanner block with some thin sheet metal until you match everything up.

    Note that if you end up shimming the lasers you will need to re-align them, which is going to be a pain if you don't have good adjustable mounts. So if you can avoid messing with the optical path that would be best!

    If so, what would be the best way to measure the height I would need the block to be? I have a digital caliper for measurements, but am confused how to measure the beam height in relation to mounting location
    A digital caliper is far more precise than necessary. Just power up the lasers, stick a tape measure in the beam just before it would enter the scanner block, and measure the height of the beam above the optical baseplate. Now measure the distance from the bottom of the scanner block to the center of the first mirror. Ideally the scanner measurement will be slightly less than the beam height measurement. The difference is how much shim thickness you need to add under the scanner block to match everything up.

    If the beam height is too low, then you have to consider shimming the lasers up, which is more involved. Alternately, if you do have access to a mill, you could put your scanner block in the mill and shave off some material from the bottom of the scanner block to lower it's height...

    Adam

  9. #19
    Join Date
    Jan 2006
    Location
    Charleston, SC
    Posts
    2,147,489,446

    Default

    To expand on what I posted above - sometimes the beam heights just don't work out. (Particularly in home-built projectors where the red, green, and blue lasers could be in wildly different housings.) One solution to this problem is to use "floating tables" for the laser mounts. Basically you mount each laser on it's own 1/4 inch thick aluminum plate, and each laser table is then supported at the 4 corners by a threaded rod with a nut on the bottom (to hold it up off the main baseplate) and a nut on the top (to keep it secure).

    This arrangement allows you to tweak the beam height of the laser very accurately, and it also allows you to adjust the beam direction (up, down, or perfectly horizontal) relative to the main baseplate. It was more commonly used in the past when you had mixtures of DPSS and direct diode lasers in the same projector.

    Here is a picture from 2007 (link) of a test stand that I put together when I was building my very first RGB projector. You'll notice that the lasers are on floating tables and the scanner block also has a large shim (5/8 inch) beneath it. The MM1 mounts are for adjusting the dichros, while the large MM2 adjusts the steering mirror that aims the combined white beam at the galvo block. Having that final steering mirror allowed for slight miss-alignment between the beam height coming off the optical table and the beam entry elevation on the scanners.


    And yeah, it is super-messy, I know! I threw it together rather quickly. The idea was to test everything to make sure it all worked before I started mounting stuff inside the actual projector case. (And yeah, everything worked. 
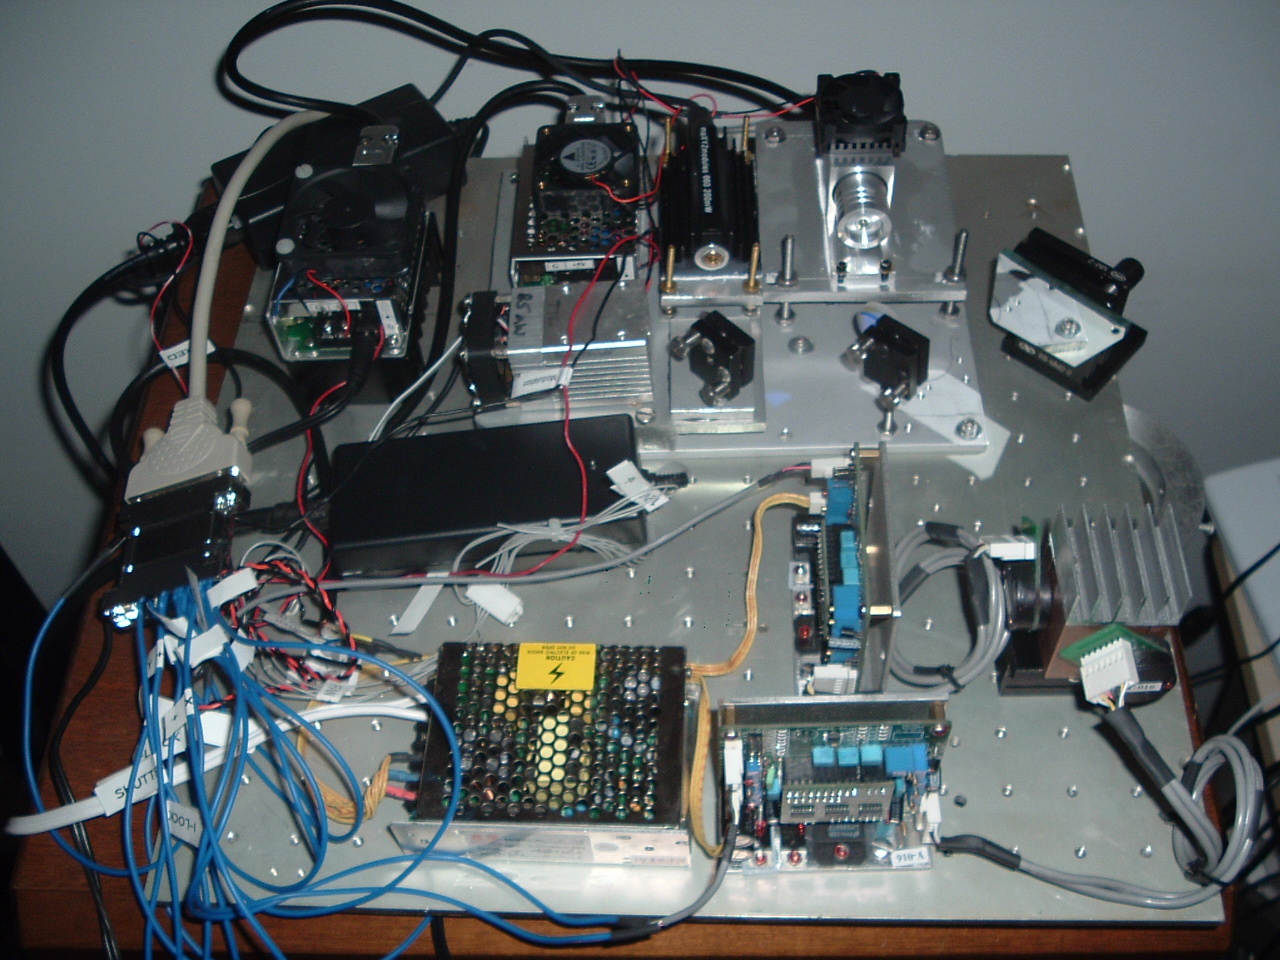
My avatar picture is from some of the "first light" pictures that I took when I first powered up this test stand.)

    Adam


  10. #20
    Join Date
    Nov 2019
    Location
    West Chester, PA
    Posts
    61

    Default

    Awesome stuff, thanks for sharing the picture as well. It gives me ideas for how I can make it work better. I thought I would be able to cut a 2x2 block of aluminum with metal blade on circular saw (metal blade), but maybe I was wrong :/. I was thinking, if I could not cut on my own, I could give a machine shop the specs and have them fab something for me as well. I did look at the diagram but for some reason it did not register that the one view shows the beam entering and the height at which it should enter. Okay, I just needed someone to help start the gears turning in my brain lol.


    Side note... If I were thinking about upgrading the lasers at any point, is there any website that sells them you could recommend or even recommended lasers? When I say upgrade, i do not mean higher power, I quite like where I am at now. I just wonder if I can get better color from better lasers vs what I have now.

Posting Permissions

  • You may not post new threads
  • You may not post replies
  • You may not post attachments
  • You may not edit your posts
  •